Why this matters
Painterly blush is everywhere this spring from Zara to Khaite, but without technique the effect can look half-baked. Teaching readers a reliable watercolor blush technique updates routines, preserves skin luminosity and makes the trend wearable across skin types and real-life humidity.
Wake up your complexion the way a painter wakes a sleeping canvas. The watercolor blush technique that dominated the Spring 2026 runways is less about a stamped circle on the apple of your cheek and more about soft, feathered color that lives under the skin. It reads modern because it borrows from classic art sensibility: thin translucent layers, deliberate placement and a willingness to blur the edges. If you care about skin that looks lived in rather than painted, this is the painterly blush you need to master.
Start with the right canvas
The watercolor effect only works if the face is hydrated, slightly luminous and free of obvious texture. Think sheer coverage tinted moisturiser or a light buildable serum foundation, not heavy full coverage. I prefer a hydrating base because it lets cream and liquid pigments sit on top and then melt into the skin. Prime only where you need it: a touch of pore-refining balm at the nose and cheeks, and a dewy face oil where you want the glow. Too much mattifying product will fight the soft edges you are trying to create.
The Brief Edit
Beauty reformulations, trend shifts and buying guidance. Twice a week, free.
Choose product types that behave like paint
For a true watercolor blush effect pick products that are sheer, blendable and reworkable. Liquid stains, whipped gel stains, and creamy sticks are your best bets. Powder can work as a top layer for diffusion, but begin with a liquid or cream so the color can be thinned and sheared out like pigment in water. Try a silky gel like Chantecaille Cheek Gelée (approx £50) for an ice-cream finish that sheers beautifully. If you prefer a modern classic, Rare Beauty Soft Pinch Liquid Blush (approx $24) gives that instant blur without drying the skin. For a multipurpose pick that can double as lip colour, I reach for ILIA Multi-Stick (approx £40), which layers well and never cakes.
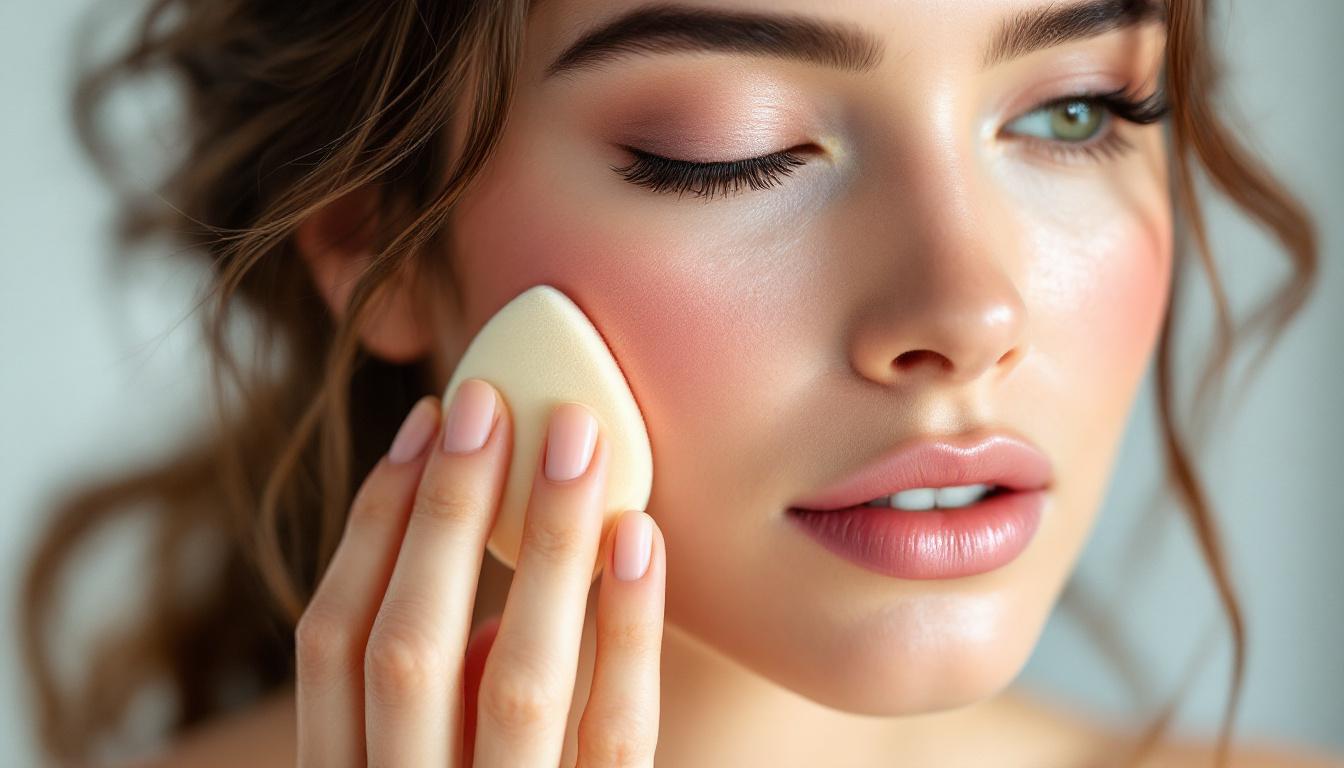
How to apply cream blush for a painterly look
Start with less than you think you need. The watercolor approach is about building transparency not opacity. Warm a pea-sized amount between your fingers and tap it into the high point of the cheek close to the apples. Then, immediately use the pads of your fingers or a dense stippling brush to press and drag the product along the cheekbone toward the temple in short feathering motions. Blend downward in the hollows for a lifted, natural finish. If you want a fresher flush, add a dot along the bridge of the nose and gently connect it to the cheeks with the same feathering motion. That blur across the nose is what makes the look painterly, not costume.
The best watercolor blush looks like sunlight on skin, not paint on a mask.
Layering and longwear watercolor blush tips
Longevity is non-negotiable for everyday wear. Layering is how you make this look last without sacrificing softness. First layer: the thin liquid or cream as described. Second layer: after the first layer has settled, dot a second, thinner wash of the same product where you want dimension. Third layer: set the perimeter, not the center, with a superfine dusting of translucent or matching- shade powder using a fluffy brush. The goal is to lock the edges so the center still reads dewy. For a true longwear watercolor blush, consider a light swipe of a long-stain product under the cream. I like to place a tiny bit of a stain in the exact center of the cheek, blend it out quickly, then layer the cream on top. The stain grips the pigment while the cream gives softness.
When humidity or heat is a concern, replace powder with a light mist of setting spray that contains film-formers to hold the pigments in place while preserving the glow. If you need mid-day refresh without piling on product, moisten a sponge with a hydrating mist and press lightly over the cheeks to reactivate the pigment instead of adding more.
Finish like a makeup artist
Edges define this look. Use a clean damp sponge or a soft synthetic brush to buff the outer perimeters until the pigment becomes part of the skin. Resist the urge to sculpt aggressively with contour. Instead, place a sliver of highlighter on the high point of the cheekbone and the inner corner of the eye to read like skin catching light. If you want a more editorial twist, sweep a complementary shade in a faint horizontal band across the temple and cheekbone. That painterly sweep should be delicate enough to look unstudied and deliberate enough to read modern, not costume.
For product layering that translates from day to night, apply a cream base and set the edges. Then, when you go out, press a second cream or liquid on the apples and add a touch of a heavier cream or balm to the center for depth. I often throw a tiny neat dot of a pigmented cream on the inner lip and blend so the mouth echoes the cheeks. That harmony reads calculated and effortless at the same time.
Common pitfalls and fixes
Too much pigment too fast is the most common mistake. If you overdo it, swipe a dampened sponge with a skin-similar moisturiser over the area, then reapply a thinner veil. Another trap is using powder too aggressively. Heavy powder flattens the watercolor effect and reveals edges. If separation occurs during the day, reactivate with a facial mist and press the pigment back with fingers. Lastly, match undertones. A cool pink on warm olive skin can look chalky; choose a cream in peachy-rose or terracotta depending on your tone.
Painterly blush is not about being subtle to the point of invisibility. It is about controlled expression. Keep your tools simple, your layers deliberate and your touch light. With the right products and a little practice, you can make cheeks that look like a study in light rather than a makeup application. That is the whole point: watercolor blush that feels like you, but upgraded.
Key Takeaways
- Build the look with thin, transparent layers for a natural painterly blush
- Start with a hydrated, luminous base and choose liquids or creams that blend like paint
- Layer strategically and set only the edges for longwear watercolor blush
Frequently Asked Questions
What is watercolor blush and how does it differ from standard blush?
Watercolor blush is a sheer, translucent approach that mimics diluted paint on skin. Unlike pigmented powders or heavy cream blushes, it relies on liquids, gel tints, or thinned creams applied in layers for a soft-edged wash of color. The result reads natural yet intentional.
Which products work best for the watercolor blush technique?
Look for liquid blushes, gel stains, tint drops and thin cream formulas that blend effortlessly. Avoid heavy foundations or matte formulations that block translucence. A small facial oil or glycerin-based primer helps pigments melt into skin so the watercolor effect looks lived-in not painted on.
How can I make watercolor blush last all day?
Prep with lightweight hydration and a dewy primer so pigments have something to adhere to. Apply color in thin layers, patting with a damp sponge or finger to build intensity. Set sparingly with translucent powder only where needed and finish with a micro-mist setting spray to fuse layers without flattening luminosity.
Blush Brief editorial is independent. We may include affiliate links; these are always disclosed and do not influence our recommendations.